Showing posts with label scotland. Show all posts

Monday, 1 August 2011

More Progress and a New One

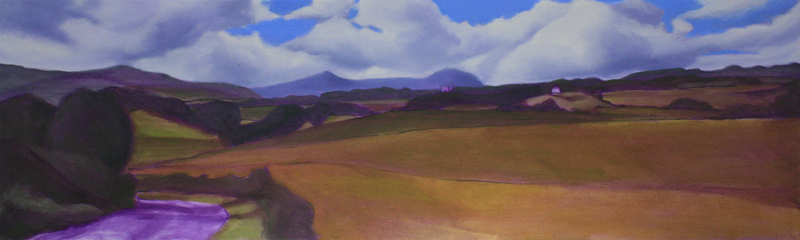
Thanks for the lovely comments on my landscape piece, it is still coming along nicely and I am really enjoying working on it.  Here it is as of last night:
There is much more I need to do on this still.  As it is quite large, I am working from top to bottom rather than all over like I usually do and I still have much of the foreground to put in.  Once it has dried enough I shall work all over it again, refining it further.  

On Saturday, I was unable to work on it once I had got some colour in, so I began my next painting, here it is just sketched in with a burnt sienna wash:
As I don't like to use solvents or any other quick drying medium, just linseed if I need the paint to spread easier, drying time is a bit longer, so something else to work on may help my productivity.  

Having said that, I feel that having a larger piece may mean that I can work on different areas while the other dries. 

Sunday, 31 July 2011

A Bit More Progress

I managed a bit more on the landscape, I worked a fair bit on the sky but it still needs some attention, plus I blocked in some of the fields and trees.  It is now beginning to look a little less purple!
Tomorrow, I may post the beginnings of another similar format painting that I have begun to draw out.  I need something else to work on while the layers dry.

Tuesday, 26 July 2011

Panorama Landscape WIP2

Thankyou very much all of you who have left such positive feedback on my newest landscape.

Here is a bit more work on it, I completely changed the sky as I thought the clouds were a bit too pointy and unrealistic.
This is it just blocked in and I will add the lighter parts of the clouds in a day or two.  I am having great time working at this size and format - and on canvas, for a change!

Sunday, 24 July 2011

Church Ruins

I haven't much to report on the progress of my latest painting as I have had a very busy week.  I have managed to redo the sky a little.  I hope to have more to show in a day or two.

In the meantime, here are a group of photos that I have taken over the years.  The subject of ruined churches appeals to me, especially the ones in a rural setting.  Part of me thinks that I would like to do a series of paintings of this subject, but on the other hand, the original photos are good enough to stand alone as they are.

Sunday, 17 July 2011

New Painting on the Easel

I have begun the next painting and got the underpainting all blocked in.  Once it is dry I can begin to get working on it straight away.
It is on canvas for a change and is 30cm x 100cm (1foot x 3feet).  I am using purple as the under colour so it shows through in the shadows (I hope).

Thursday, 14 July 2011

Bluebell Woods, Finished

I am so pleased to have this painting finished, it was a lot of work, with many twists and turns and a heck of a lot of learning in it!

The scene is of some beautiful traditional bluebell woods in Murthly, Perthshire, made famous by the pre-raphaelites, in particular, John Everett Millais who painted in Murthly.
And here it is in all its stages, missing out the scraped off, one step forward and two back, stages!

Sunday, 10 July 2011

Bluebell Woods - Work in Progress Part 2

I am still working on my bluebell woods painting, it is taking a lot longer than I thought it would!  After a bit of a panic thinking I just couldn't cope with all those trees and all those bluebells, I think I am almost there.

This is where it was last night.  More has been done to it since, but I am beginning to think I prefer last night's stage better.  Hmm.

Hopefully, soon I will be able to post the final, finished version!

Saturday, 9 July 2011

Beeswax Collage Revisited

While looking for my bookbinding kit so I could get started on pimping my sketchbook (see previous post), I found this little beeswax collage that I had made (and not sold) many years ago.  I used to make these a lot and they were great fun.  You can see more in my Mixed Media page, here on this blog (link just underneath the banner).

They were very popular too and sold all over the world.  I used to enjoy using up those little bits of drawings, etchings, screen prints, found ephemera and papers by creating collages, using the beeswax as a binder instead of glue.  The benefit being that layers show through because the beeswax makes the papers transluscent.  Another benefit is that unlike glue, you can easily undo a mistake by reheating the wax if needed, to reposition an element.

I used locally sourced beeswax which made me feel connected to my community and I was always tempted to buy some jars of delicious locally made honey.  The smell of the wax melting in my wax pot was delightful.  I kind of stopped doing them when I began to paint seriously, I guess I needed the workspace and my pot got put away.  Maybe I should get it out again?

Friday, 8 July 2011

The Sketchbook Project

I am very excited to announce that my sketchbook arrived, much sooner than I expected too!

Here it is about to get a bit of a makeover - I shall rebind it with some extra pages, some watercolour ones and also some Frederix canvas sheets, so I am ready to work in whatever media takes my fancy.  Somehow, I don't think I will be working from page 1 through to the end, but dotting about here and there.

I also shall decorate the cover (being careful not to paint over the barcode, that is).  

So, next time you see this sketchbook, it will look quite different!

Sunday, 3 July 2011

Solvent Free Brush Cleaning

I suffer from very severe asthma and solvents really affect my breathing.  It took me a while to figure out why I was so ill at university where the studios were always full of fumes.  

I spent a lot of time in the printmaking studios and they too used solvents for cleaning up.   Once I began to figure out that inhaling vast amount of solvents every day was affecting my health I did a little research and discovered that some printmaking studios in Australia were pioneering a green method of using no solvents at all.  They just cleaned up with vegetable oil and soap and water!

It didn't take me long to realise that the same could be applied to oil painting as well.  

So now I paint almost entirely without solvents.  I do miss them slightly, in fact I love the smell of proper turps and used to love using a turpsy wash to establish the first layers, but it is well worth not using solvents to be able to paint in oils again after thinking I couldn't.

Having said all that, I do take solvents out with me when I do plein air painting because I hardly breathe any in out in the open.

But how do I clean my brushes, you may ask?

First of all, I wipe most of the paint off my brushes onto old phone book pages.

Then I wash the brush in one of those cleaning tanks filled with cheap linseed oil.  

I use proper artists linseed for moistening the paints if absolutely necessary.  Mostly, it isn't necessary and I use the paints straight from the tube.

After washing in the tank and wiping the excess oil off on paper towels or rags, the brushes are ready to be used again.

During the painting process I use a set of brushes for dark and another for light and most of the washing gets done at the end of the painting session.

To clean the brushes properly at the end, I put them through the tank, wipe off the excess oil onto a rag or paper towel, then plonk the brushes in a jar of Daler Rowney Water Washable Brush Cleaner or just simple liquid soap which I keep in a jar with a metal sink filter at the bottom to work the bristles.

I think the DW Cleaner is liquid soap and some kind of oil and that is what I will replace it with when it is all gone.  

The brushes are perfectly clean after this process and once dried they are ready for use the next day.

My lungs are happy, my brushes are happy and I am happy.

Friday, 1 July 2011

Bluebell Woods - Work in Progress

It has been a busy week here and little progress has been made on this painting, aren't these colours fun?
Here are the first few block in stages, I have worked a little on the background since this photo was taken and am now planning to work forward to complete the foreground.  There wa a set back with this during the week when I worked on the wooded area at the back and went to bed, thought about it and decided it wasn't right, so got up and wiped all that evening's work off!

I will be busy teaching tomorrow at my local guild of Spinners, Weavers and Dyers, but hope to get back to the painting on Sunday, bringing it to near conclusion I hope.

The piece is 12 x 12 oil on board.

Sunday, 26 June 2011

Cycle Paint Cycle

I thought it was high time I did a plein air painting, so I packed up some essential supplies and got on my bike.  I had identified a site last weekend, not too far from home for my first foray, so I was able to waste no time selecting my spot.  

The weather was a bit dull and slightly damp this morning so the lighting wasn't perfect.  I sat down on the ground with my pochade box on my lap.  

My supplies were limited with only 3 brushes, 6 tubes of Griffin Alkyds, thinners and a tear-off palette.  I am used to sketching a lot before I even look at my paint, but decided to force myself to use a turpsy wash instead.  Because the scene was mostly green, I used cad red and alizarin for the wash.  The board is just 8 x 8" and I found it difficult not to have smaller brushes for any finer details.

Here is the result, which is far from perfect (I can now see a huge compositional error straight away), but not the disaster I was afraid it might have been.  I am encouraged enough to do it again and I really do not mind what the end result is, it is the process that is important to me.

Wednesday, 22 June 2011

Buttermere

At last I have a new painting completed and I am really pleased with how it turned out.  Finally, I am feeling more comfortable both with the oils as well as painting the landscape.  I have stopped wanting to chuck the oils out and paint still life in watercolour!

This is a scene of Lake Buttermere in the English Lake District, a very beautiful place with a lovely walk along its banks.


Never fear, I haven't forsaken Scotland - if the weather improves for the weekend, I intend to do some plein air painting locally when I can figure out a way to carry my gear on my bike.  Whether I show the results or not remains to be seen!

Saturday, 18 June 2011

The Sketchbook Project

Last weekend I signed up for the Sketchbook Project.  It is the first time I have taken part in this exercise and I am looking forward to receiving my sketchbook and getting started.

I used to be heavily involved in the world of altered books and decos, so this sort of thing isn't new to me.  


Also, throughout college and university we were encouraged to keep sketchbooks and the habit has remained, although sometimes my sketches are decidedly messy and not something I would wish to show anyone!
 
You can choose a theme and the one I chose is "In 50 Years" and I have two ideas to decide on.  One is about a 50 year- old person/s and the other idea is a continuation of the landscape theme I am currently working. A look at the changes in the landscape over the last 50 years with perhaps a hint of what may come over the next 50.

It is likely my sketchbook won't arrive until mid-July as the organisers are at exhibitions just now and post to the UK from the US probably won't be all that quick either.  It gives me plenty of time to consider my options anyway.

Tuesday, 14 June 2011

Keeping Paints on the Palette Usable Over Many Sessions

Because I tend to work on my paintings a little at a time most days, rather than in big blocks of time, I need a method to keep the oils on the palette from hardening. I like to squeeze out a decent amount and really do not want to throw any of it away after just an hour or so of painting.

Here is my solution to the problem.  I have a Daler Rowney Stay Wet palette intended for acrylics, which really doesn't see any acrylic action these days.  The well is 14 x 10", so I cut a board to fit inside the well and cover the board with freezer paper.  


Because the paper is bright white I wipe some burnt umber alkyd paint all over it to reduce the white and to help make colour mixing more accurate. It dries in a trice and in the meantime, you can draw out the composition.


When I finish the day's painting I pop the lid back on the palette and put it in the refridgerator and the paints don't dry up as quick as they would if they were just left out in my work area.  I have read that some people put a drop or two of clove oil on a cotton wool bud and pop that inside as well, but I don't find the need to do that.
The freezer paper can be cleaned off a few times, I tend to wipe up the centre mixing area, leaving the tube paint in piles, but eventually the palette needs a clean up.  Instead of scrubbing away at a traditional wooden palette like I used to, I now just throw away the old used freezer paper and put on a fresh one.  This works perfectly for my busy life.

Sunday, 12 June 2011

So, Why "Walk Paint Walk" Then?

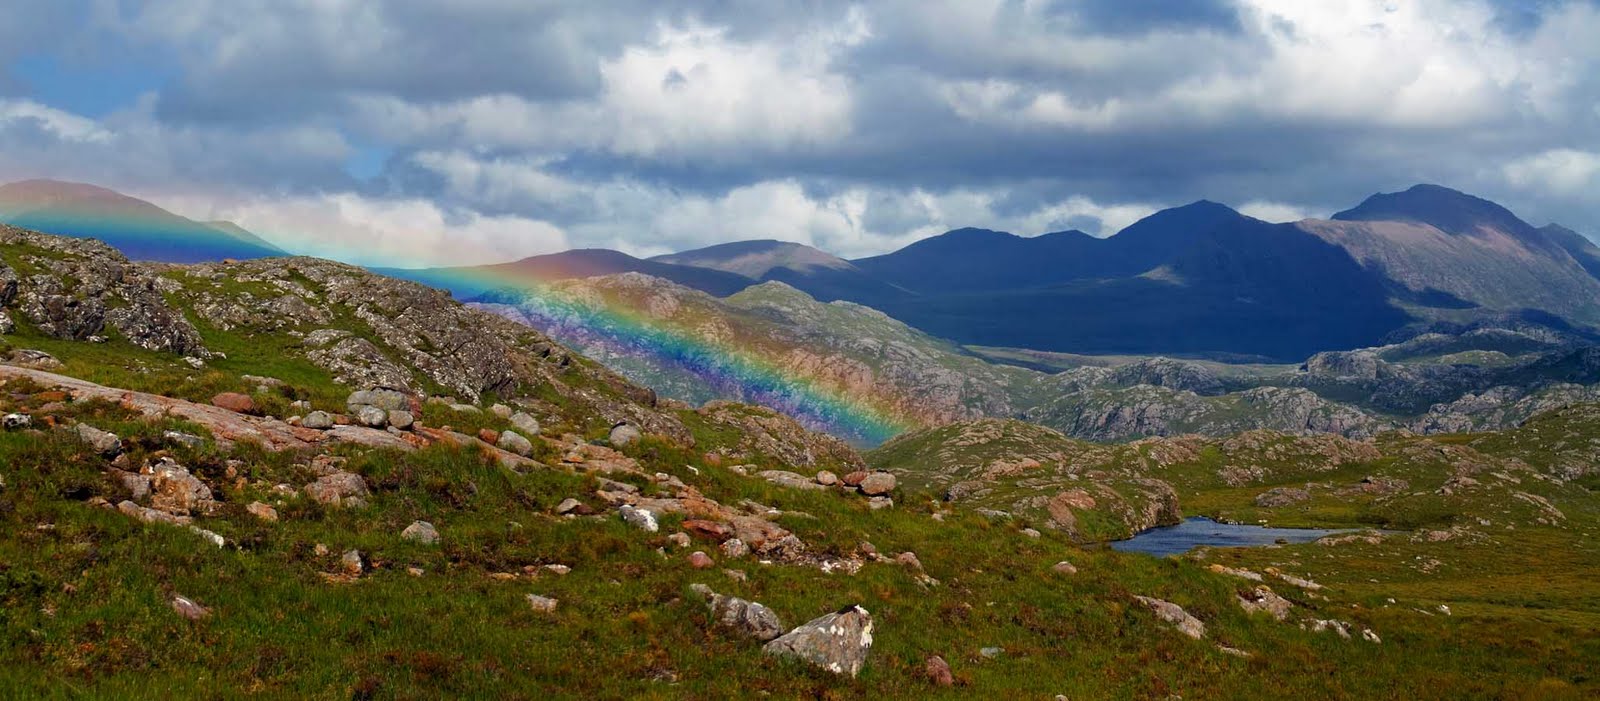
Gleann Garbh Rainbow
For a long time my art consisted of paintings of still life and the odd portrait/life painting, mostly in watercolour, but occasionally oils.  I found still life to be a suitable subject for my busy life.  A  set-up didn't really change all that much and was always there ready to be painted when I had the time to paint it.  I also had (and still have) many ideas and themes I wanted to explore, using objects to symbolise other meanings. 

But for a long time I yearned to paint some of the beautiful countryside around me, Scotland is a glorious place, with awe-inspiring mountains, lush colours, oh and a lot of "atmosphere" (ie, weather)!  I had felt intimidated by the vastness of the vistas before me and preferred paintings that were more unusual, avoiding the cliche and tourist images that are too often seen.  I wanted to explore Scotland to a greater depth than a mere photo taken a few steps from the car and there really is only one way to do it properly.  You have to get your boots muddy!

Two years ago, I decided on a fitness programme and worked up my ability to hike longer distances, greater inclines and rougher terrain.  It took a while, but the rewards of at last being able to see Scotland from greater heights and in more remote places was well worth the bruises, aching joints and blisters.

So now I hike whenever I get the opportunity, which isn't as much as I would like, but is a treat.  I go armed with tons of camera gear and take a lot of photos.  Soon I will go armed with paints and pochade box instead, but that will have to wait until I get to grips with actually painting the landscape.


View from Top of Beinn Alligin

I have heard it said that landscape is the easiest subject to paint, followed by still life then portraits. I am finding landscape a big change from my previous subject matter and am still intimidated by all the green, the rocks, aerial perspective, composition, skies, trees and water, but determination and practice will get me there and I won't give up.  I never do.

So far this year I have painted over 30 landscape studies, most of which have ended up in the bin, I still have a long way to go, but it is beginning to fall into place and I am finally making progress.  Of course, it doesn't help that I have also switched medium, from being a resonably adept watercolourist, I am now using almost exclusively, oils.  

So two major changes at once - subject matter and medium have given me a big learning curve.  Heh, I never choose to take the easy route.

Saturday, 11 June 2011

How it all Began

Early work - in the style of Derain

I am quite excited about having a blog, it took me a while to decide to go for it and now I am glad I have.

Today's post is going to be a bit more of an introduction to me and how my art developed.  I shall try to be brief and perhaps elaborate in later posts if necessary.

Of course, like many artists, I enjoyed art as a child and showed promise.  Like many others also, I was discouraged by my parents to study art at exam level and had to take other subjects at school.  I still drew and painted occasionally in my spare time, but I also enjoyed many other arts and crafts. 

It was while investigating spinning and weaving, that I decided I wanted to understand colour and an opportunity arose for me to take a beginners art class at a local college.  Sometimes the right person comes along at the right time and the course was led by a wonderful teacher.  Her name was Jane and she taught me so much.  She obviously realised some potential in me and brought it out.  My art was still very basic in those days, but I began to understand tone and form and I was introduced to many different media, many of which I had never tried before.

Oh dear, I am not being very brief here, am I? OK, will try harder!
The course ended and I passed and came away with a renewed passion for art intending to study it further at a college locally.  The timing wasn't quite right for me, because my then husband's job moved us far away to Scotland, where I remain to this day as I have fallen in love with the country and its people.  


Life Painting in Watercolour

I attended a life drawing class run by the local university and I also attended a watercolour class run by a very talented husband and wife team.  I was learning so much and enjoying it immensely, but I still wanted to take it to a higher level and study art at college.  I remember sending away for a prospectus for a fine art degree at one of the best universities in the country and when I got it, I saw the work in there and thought "I couldn't possibly do that", so I put the brochure away.

Sometimes things just happen right, though. Again, one of those serendipitous meetings (at the local cattery of all places), introduced me to an art course run by another fabulous teacher.  Two years  of hard work and a lot of learning really brought my art up to a standard that even I was happy with.  Finally the life drawing practice began to pay off as the figure became easier and with that an improved confidence in general.  I now began to think about applying to that university that I had felt unworthy of two years before.  In the meantime, I took a full-time portfolio preparation course at college and with great trepidation applied to the university.  I got in and four years later graduated with an honours degree in fine art. 


Life Study at University

Over those four years, my studies took me through drawing, painting, printmaking, sculpture and even film.  My graduation piece was an installation including film.  Nothing like I would have expected all those years ago when I began my art journey.

During this period though, my home life hadn't been so easy, my marriage had broken up and finances were very tight, so my initial intention of studying further to masters level had to be shelved while I found work.

Now I can manage financially and I work on paintings and photography in my spare time.  I exhibit and sell locally and am really happy to continue to explore art and grow as an artist. 


Contemporary Pear - Watercolour
I am currently investigating a masters degree through open learning as I know I have so much more to discover about art.

My next post will be about the title of my blog - why "Walk Paint Walk"?

Monday, 6 June 2011

My First Post

OK, lets try this, one day I may just get this blogging lark right and manage to stick with it!  

This blog is going to be about my walks in the beautiful Scottish countryside and about the paintings that these walks have inspired in me.

There will be photos, there will be paintings, there will be musings, there may be some hints and tips.

My next post will be a little bit about me and how I got to be where I am now.

Rolina x